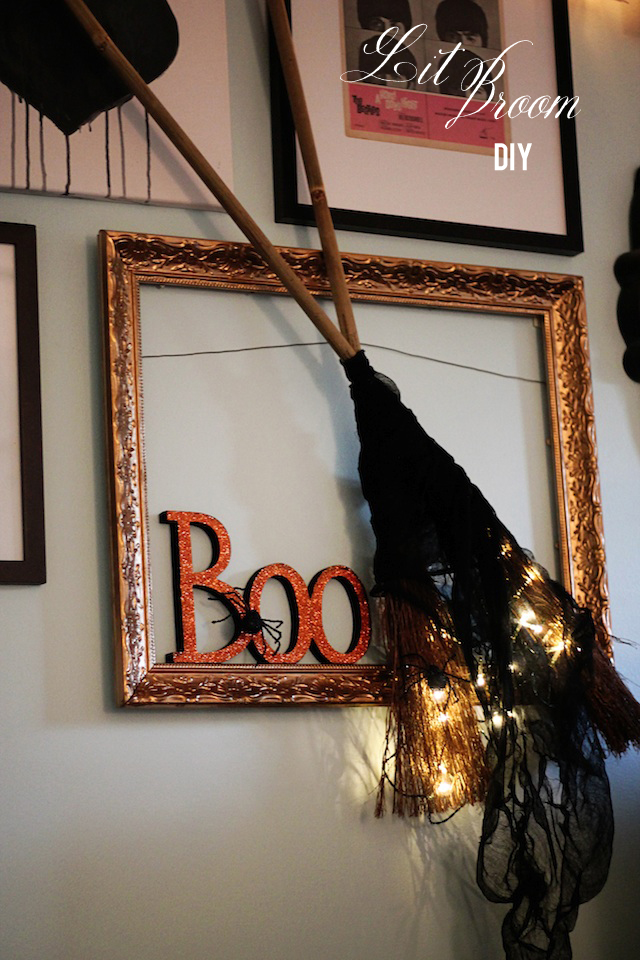
One of the things I was coveting from the Pottery Barn Halloween section this year was a lit twig witch’s broom that they had. Only it was a cool $89 (now $69 on sale) and I just couldn’t justify it. I remembered that Target puts those twig witch brooms out every year for little girl witch costumes and this idea popped into my head. There is no question that the one from Pottery Barn looks nicer than my little copycat turned out. But mine only costs $20 to make which is a pretty good savings in my book. That includes buying one of those battery operated LED light strands that Target also sells from Halloween through Christmas. If you wanted to use a strand of Christmas lights you have, it would be even cheaper.
What you’ll need:
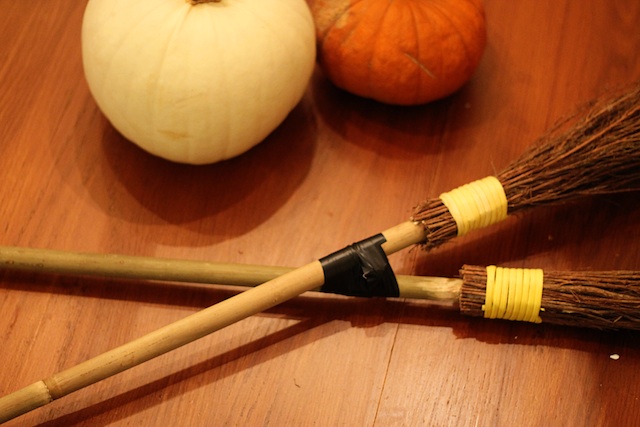
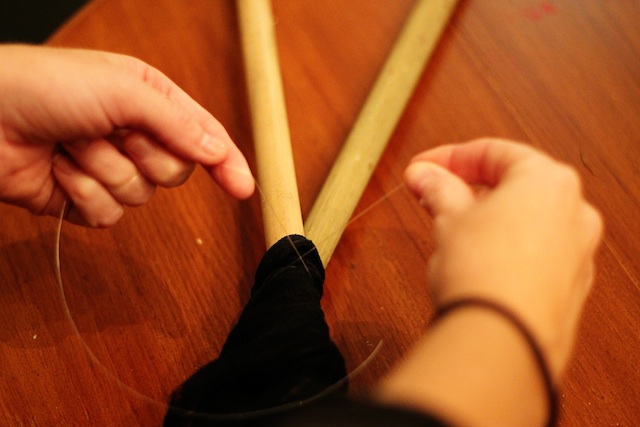
– 2 Target twig brooms for $3 each
– 1 black spooky cloth- also purchased from Target or wherever you find it. I saw some at the dollar store as well.
– strand of white lights – I like the battery operated LED lights from Target because then you don’t have to worry about plugging it in
– electrical tape, a twist tie, some cardboard and fishing line (I already had all of these and I assume you do somewhere as well
What you’ll do:
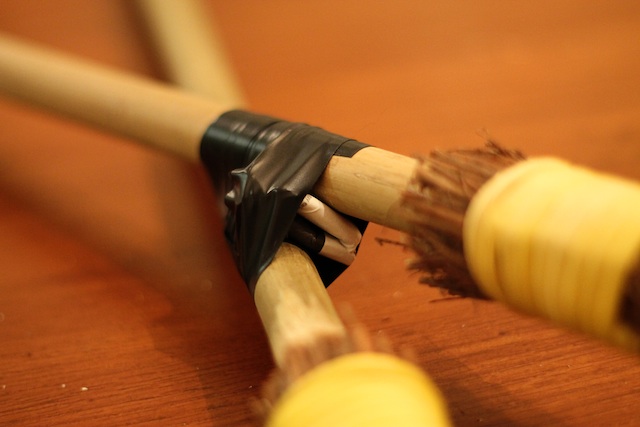
1. Start by using a larger plastic twist tie (I always save mine from when things gets shipped to me) and tie your broom handles together where you see fit. Then take a piece of cardboard folded and rolled up so that is thick enough to be inserted between the handles under the twist tie and it will hold the brooms crossed as far apart as you need them to be. Finish this by wrapping electrical tape securely all around the whole area so that it holds the handles and the cardboard tightly in place. It sounds complicated, I realize, but once you are doing it you will see what I mean. Without the cardboard in the middle, the brooms are all flopping around.
Like so
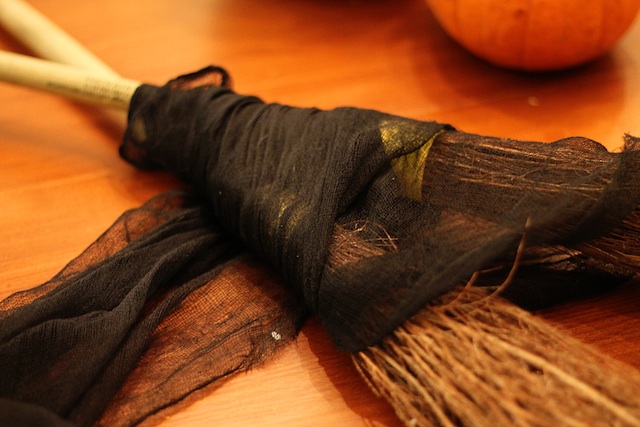
2. Then take your spooky cloth and wrap it around starting over the electric tape and working down over the brush part of the broom. I let the end of mine flop down through the middle of the broom. This fills out some of the empty space between the brush parts. You may want to use scissors and make the bottom look all straggly like Pottery Barn did. I just ripped some holes in my cloth (easy because it is actually just cheese cloth) and called it a day.
3. I used fishing line and wrapped it several times around and knotted where the top of the spooky cloth was to secure and provide a way for me to attach it to the hook I already had on my wall.
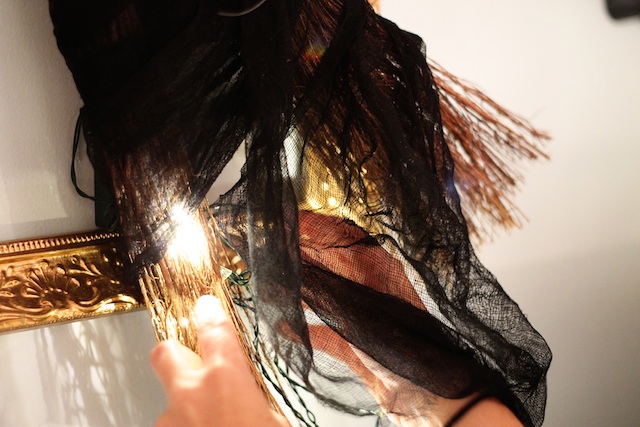
4. Find a place to put your battery box if you are using LED lights. Mine is on the frame rim. Then start stuffing your lights up into the twigs and under the spooky cloth on your broom.
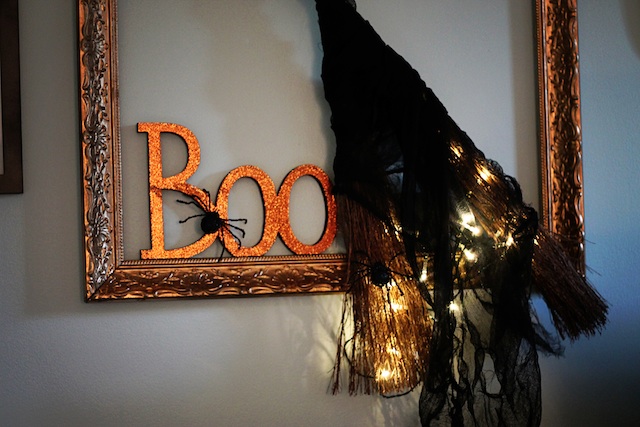
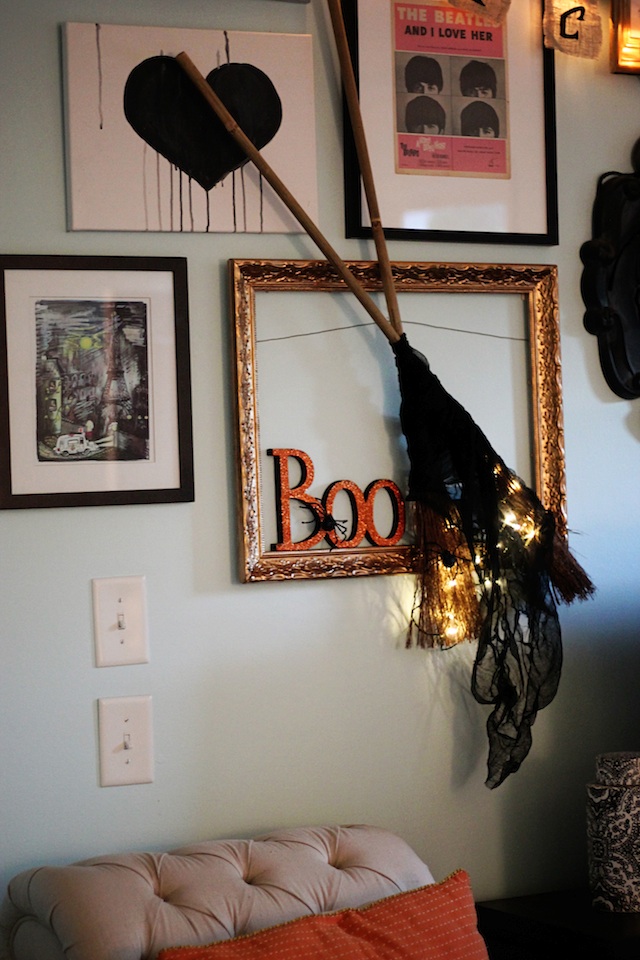
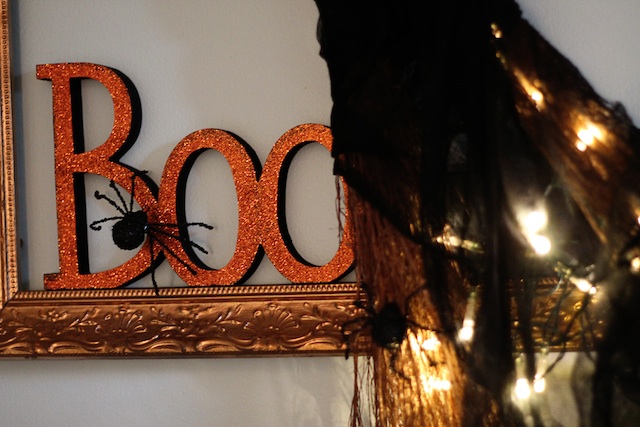
Boo!

I LOVE IT!!! You are so dang crafty! We received our fancy invite yesterday and I laid it on the counter for matt to see. He didn’t even have to ask who it was from. He said “YES! This has got to be from Colleen and Megan!” 🙂
Can’t wait to see the rest of the Halloween details!
Thanks Christina! Hope you guys can come :)! Tell Matt hi from us
I love showing all my South African friends how awesome my two American friends are, especially during Halloween. No one does it better than you two!
That’s so sweet Blair! We love Halloween! Hopefully one of these years you will be able to come home for it and come to our party! There is nothing like NC in the fall! Miss you!
Neat! You will have to let us know when/if the kitties try to make the dangling cloth their new toy!